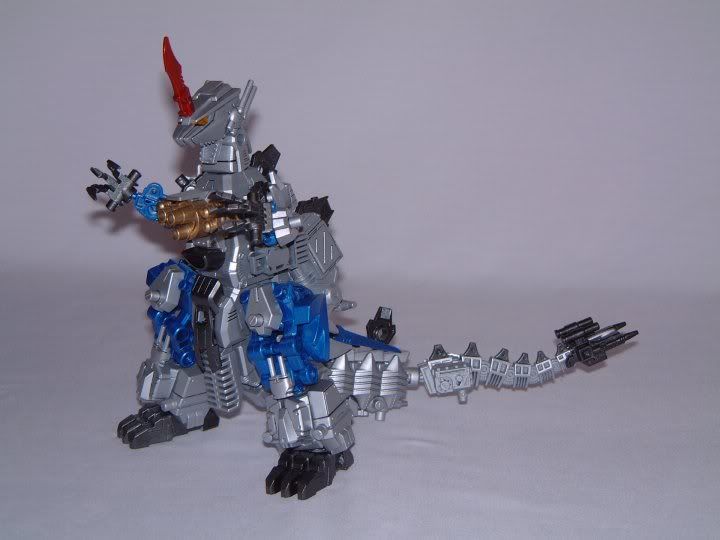
Yes, I finally get enough parts to build another LB KG, and this time I will make a guide.
無錯,終於集齊零件再去製作LB KG了,同時,這次會製作一個組裝說明。
However, it will too much for do it all at once, so I will make a few parts to it.
不過,一次過介紹就太多了,所以會分開數部份來說明。
and it maybe not clear enough, but I will try my best to do it.
還有,可能會不太清楚,但怪獸會盡力去解說的了。
===============================
First, make sure you are able to take a risk of losing a few Zoids. During the customize, if any problem appear for the LB KG, you may lose a few Zoids parts or even the whole Zoids. If you can't take the risk, better give up now.
首先,你要準備會失去數台Zoids。因為在改造過程中,要是出了什麼問題,你可能會失去那些零件什至整台Zoids。如果你無任何準備或不想失去這些Zoids的話,還是放棄好了。
Second, you need minimum of the follow Zoids-
其次,你需要這些Zoids。
EZ-074 Death Razer
GZ-004 Hound Soldier
BZ-006 Shellkarn
NBZ-001 Brave Jaguar
NBZ-002 Hard Bear
NBZ-004 Rapto Jaguar
LB-003 LB Gojulas MK-II
Last, you need these tools-
最後,你需要這些工具-
drill bit/轉咀/轉頭
glue/super glue/膠水/強力膠/超能膠
model cutter/模型剪
model knife/craft knife/模型刀/筆刀
putty/畢地/補土
saw(a nice small one will nice cutting)/鋸(要精細的)
sand paper/砂紙
files/銼/銼刀
If you got all these, we can get start now.
如果有齊這些,我們就開始吧。
First, we start with a head-
首先是頭部-
You need-
你需要-
NBZ-001 Brave Jaguar
#A1, A2, A4, A5, D1, J11 and the cockpit cover/駕駛艙門
Optional/選擇性
Tail parts/尾巴
NBZ-002 Hard Bear
#A2, A3, A4
LB-003 LB Gojulas MK-II
C09 x2
First, the A1 and A2 parts, those hole for the lower jaw's open/close(the area with red circle), get the hole little bigger. big enough to put the Hard Bear's lower jaw in and move freely.
首先,拿A1和A2,把下顎活動的的那2個洞(紅圈指示的地方)弄大一點,大得可以讓Hard Bear的下顎活動自如。
Cut the circle area, it is use for putting the teeth from the Hard Bear.
把紅圈的地方剪掉/除掉,那是用來放Hard Bear的牙。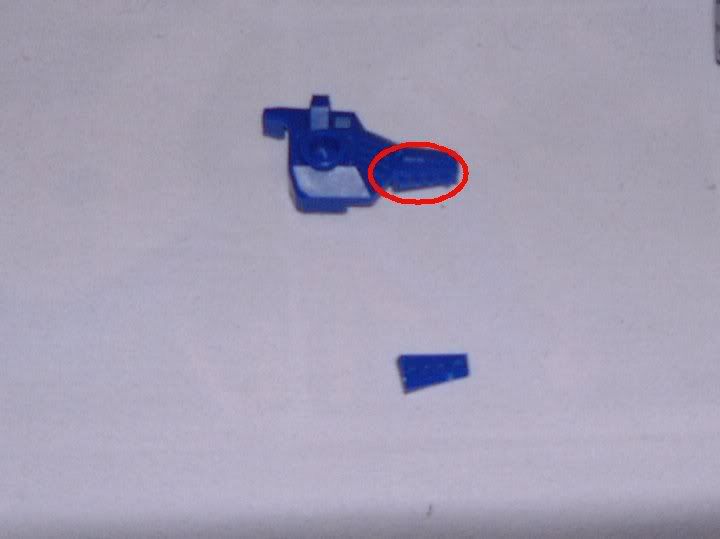
Then, use a saw or model cutter to cut those teeth from Hard Bear like the one in the circle.(that why you need a nice small saw)
跟著就是弄Hard bear的那組牙出來,使用鋸慢慢的弄出來是最好的。(所以要一把精細的鋸子)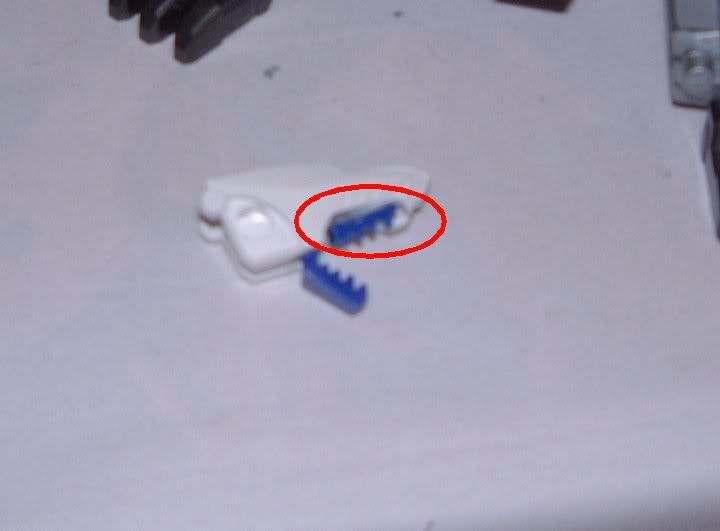
Put the teeth on to the Brave Jaguar's head. You can said this is the hardest part for the whole custom.
跟著把牙放在Brave Jaguar的頭,你可以說這地方是整隻改組中最難的地方。
After that, you just follow the Brave Jaguar manual to build the rest of the Head part.Then, use putty to fill any holes you see and you want to cover it. I also cut the ear from the cockpit cover.
跟著你只要跟著Brave Jaguar的說明書,把餘下的頭部零件組在一起。跟著就用畢地/補土把你看不順眼的地方補掉。怪獸還把耳朵剪掉。
Next is the Blade Horn, this is option for what you use as a horn, this is just what I have use-
跟著是頭上的角刀,用什麼在作是各位的自由,這是怪獸所使用的-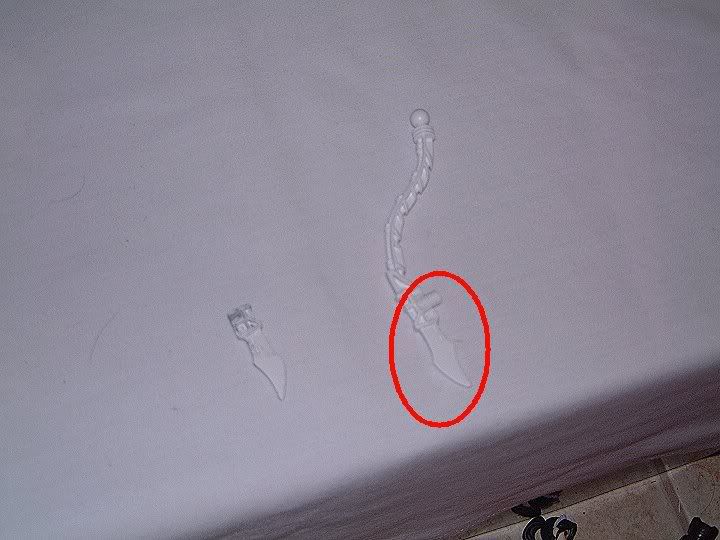
cut around the circle area, and fix the shape to looks like a blade to you.
把紅圈指示的弄出來,再把它弄得像角刀。
The last is put it on the head, also put the C09 x2 from Gojulas.
最後,就是把它放在頭上,再把Gojulas的C09 x2放上。
If you understand and follow what I have said, this should be what you have now.
如果你明白怪獸所說的和跟著來作,你應該會有像下圖的一個頭。
Looks so much different? Of course, my one already paint, it must be different. If you paint the head just like I did, you should have something like the left one too.
看下去差很多?當然了,原來的上了色,當然差很多了。如果你上的顏色跟怪獸差不多的話,你應該會有一個像左面的頭。
Ok, that all for now, I know is not clear. If you have any question, I will try my best to answer it.
好了,暫時這麼多,怪獸也知道很不清楚。如果有問題的話,怪獸會盡力嘗試去解踏的。
Friday, March 14, 2008
Making a LB KG/如何製作LB KG Part 1
Subscribe to:
Post Comments (Atom)

3 comments:
Also maybe you could let us know a little bit more about the thinner and the liquid ratio.
If you use hand brush, spray or airbrush?
Thanks!
Sorry, but no color guide for my custom, since I like to use the color I like on my Zoids, that's mean they are not offical color.
Beside, everyone use the same color will be no fun at all.
or suggestion of the ratio to let us have some feeling about mixing the color to thinner or lighter etc. Like the recipe, you don' t have to follow the guideline to add a lot of flavor, but it is just a suggestion and is really helpful to let people get the scense of it.
Or this is a secret speical color that you don't want other to know ^^"
Post a Comment